Overview: Breaking the parentage is the initial step in either transferring your Child's ASINs to a different variation or constructing a new variation.
1. Backup Data
Download the Category Listings Report (CLR). Go to Reports> Inventory Reports. On the dropdown menu, select Category Listing Report then click Request Report.
2. File an urgent case with Seller Support asking them to “break the parentage.”
- Click “Help” on the upper right corner of the Seller Central dashboard.

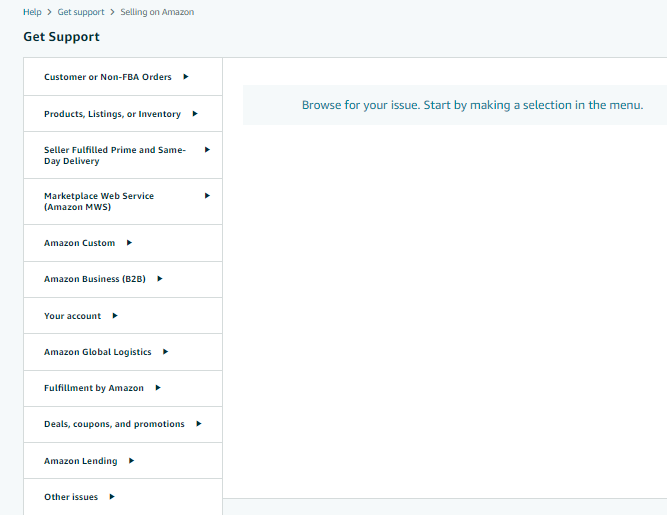
- Click “Get Support” at the bottom part of the page.

- On the Get Support page, click on “Selling on Amazon”

- At the bottom part, click “Or, browse for your issue in the menu”

- Click on a category that relates to the reason why you're filing the case. For product information-related issues, choose "Products, Listings, or Inventory"

- Suppose we opt for "Inventory File Upload Issue". Complete the required information to submit a ticket. Next, provide a brief and clear explanation of the issue, and make sure to mention the Parent SKU/ASIN that you wish to break. Ensure that this information is included.
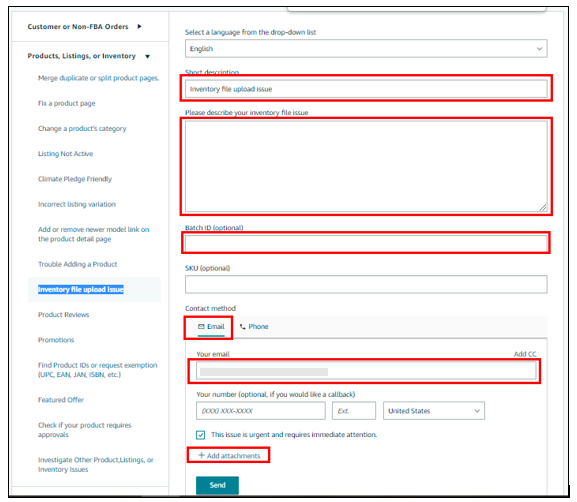

- Carefully review the information above and then submit it. Keep track of Amazon's Seller Support's response to the created case.
3. Break Parentage by deleting the parent listing:
The quickest and simplest method for breaking the parentage is to delete the parent listing. This results in the complete breaking of the whole parentage, causing the child listings to become individual listings.
NOTE: Although the parent SKU can still be utilized after deletion, take note a new ASIN will be generated.
a. Delete the Parent listing Manually
I. Go to Inventory > Manage All Inventory
 II. Search for the parent listing using the SKU or the ASIN, ensuring that the status and fulfillment status is set to All.

III. Click the arrow to reveal all the child listings
IV. Tick the box on the left side portion of the parent listing row

V. Click the “Action on 1 selected” button and choose “Delete products and listings”


b. Delete the Parent listing via Flatfile
I. Download the Category Listings Report (CLR). Go to Reports> Inventory Reports. On the dropdown menu, select Category Listing Report then click Request Report.


II. Once the report is generated, click “Download”.
III. Save a copy of your CLR
IV. Open the file and click “Enable Editing”.

VII. Delete all the rows of the SKUs that you don’t need.
From this:

To this:
NOTE: When deleting a listing through a flat file, only the SKU of the item is to be deleted and the “update_delete” option needs to be filled in.
VIII. Once you fill out the two fields mentioned above, to Catalog > Add Products via Upload > Upload your Spreadsheet. Refresh the page first before attaching the file and make sure you’re on the right Amazon account. Then click Upload file.
 NOTE: It may take 5 - 15 minutes for the SKU will be deleted on the backend.
c. To confirm that SKU has been successfully deleted, go to the Inventory section, then select Manage All Inventory. From there, search for the SKU in question and confirm that it is no longer listed.

