WFS Shipment Creation
Who is this for?: The responsibility for Walmart's shipment of inventory creation lies within its supply chain management and logistics teams.
Objective: The primary objective is to fulfill customer demand by creating accurate and complete shipment orders. This includes capturing the right products, quantities, and any special handling instructions to meet the specific needs of each store or destination.
In this SOP, you will learn how to create an inbound order, prepare the shipment, and generate the carrier and receiving labels.
How to Create an Inbound Order
1. Log in to Walmart seller central account. Go to https://seller.walmart.com/
2. Look for “Inventory” under WFS.
3. Click the item that you want to create an inbound order and click "Send Inventory".
4. Fill out the Ship from address, Total units, Master case setup, Unit per master Case, and Pack and Label.
- Ship from Address - Confirm from the client.
Add the Ship from address.
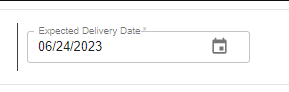
- Expected Delivery Date - Provide an expected date of delivery.
- Total units - Total sellable units for the item across all master cases.
- Master case setup - How you’re packing the outermost box. Each box may have a single sellable unit, or it may have an inner case pack with multiple sellable units packed together.
- Units per master case - Number of sellable units inside the outermost box. For individual packaging, it’s automatically 1. For this example, we will send 10 cases with 11 items each.


- Pack & Label - Indicate whether you want WFS to prepare your items for fulfillment. See charges below.
 5. Once all requirements are filled out, click “Create”.
 6. A message below will pop up, click “Create” to proceed.
7. The summary of created inbound order will show up.

How to Prepare the Shipment
1. Look for “Inventory” under WFS.
2. Click the three dots align to the created inbound order.
3. Choose Set up shipment from the options.
4. You can also click “View order” and click “Set up” on the next page.
 5. Choose Set up shipment from the options.
- Items - Review your shipment quantity, you can still update the shipment quantity if needed. Then click “Next”.


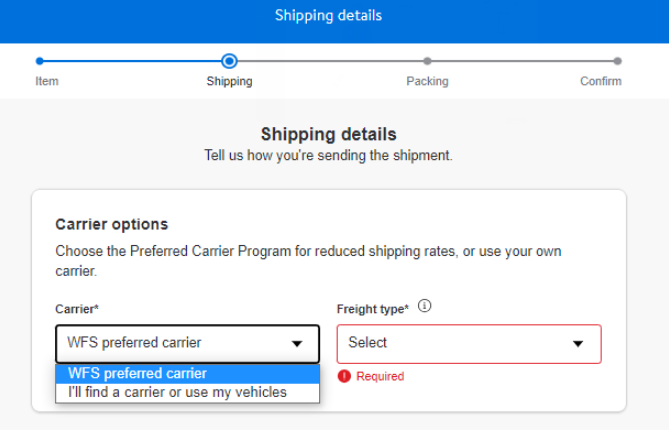
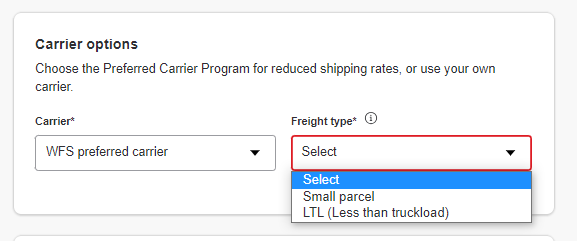
- Shipment and Labeling - Choose your preferred carrier, it can be WFS or other carriers. Also, choose whether your item will be shipped with Small Parcel or LTL.


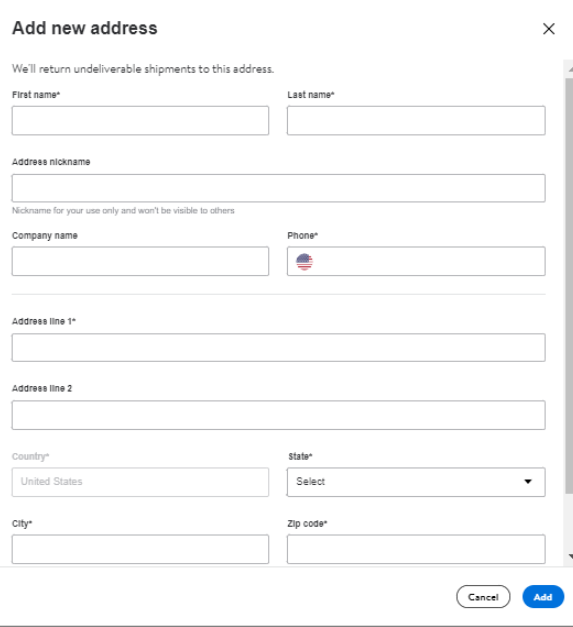
- Provide the Ship From address, click the “Add new address” link.
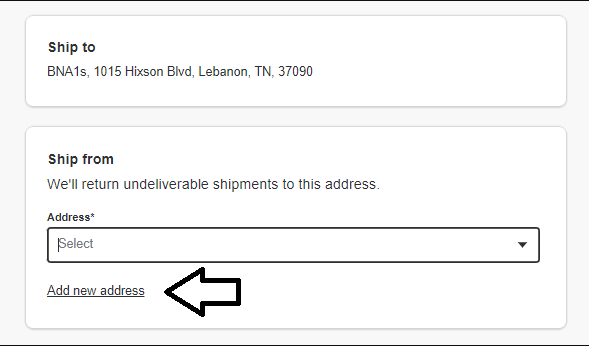

- Fill out the Ship From address together with the Contact Name and Phone Number.

6. Click “Next” once the required details are filled out.
7. Next fill out the dimension, length, width, height in inches, and weight in pounds, number of master cases, and Single or mixed SKU. Click the “Calculate” button to see the estimated shipping price, then click “Next”.
8. Review the shipment details, if all details are correct, accept the estimated price and agree to the WFS Preferred Carrier Terms of Service click “Confirm”.
9. Shipment label will now be available. To process your outbound shipments download the shipment label, click "Print Labels".
10. Choose label format and size from the dropdown and click "Print".
11. A new tab with the label will be opened, click the "Download" button.

