Setting up a New Shipping Template for Seller-Fulfilled Prime SKUs
Who is this for? Anyone who works in the catalog management team, specifically those who are responsible for setting up new shipping templates for Seller Fulfilled Prime SKUs.
Objective: To provide step-by-step instructions on how to set up a new shipping template for Seller Fulfilled Prime SKUs to ensure efficient and accurate shipping to customers.
To create a new shipping template on your Seller Central Dashboard, follow these steps:
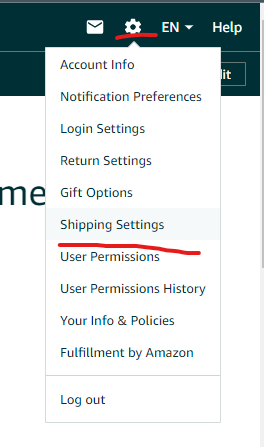
Go to the "Settings" tab located at the top right-hand side of your dashboard and select "Shipping Settings" from the dropdown menu.
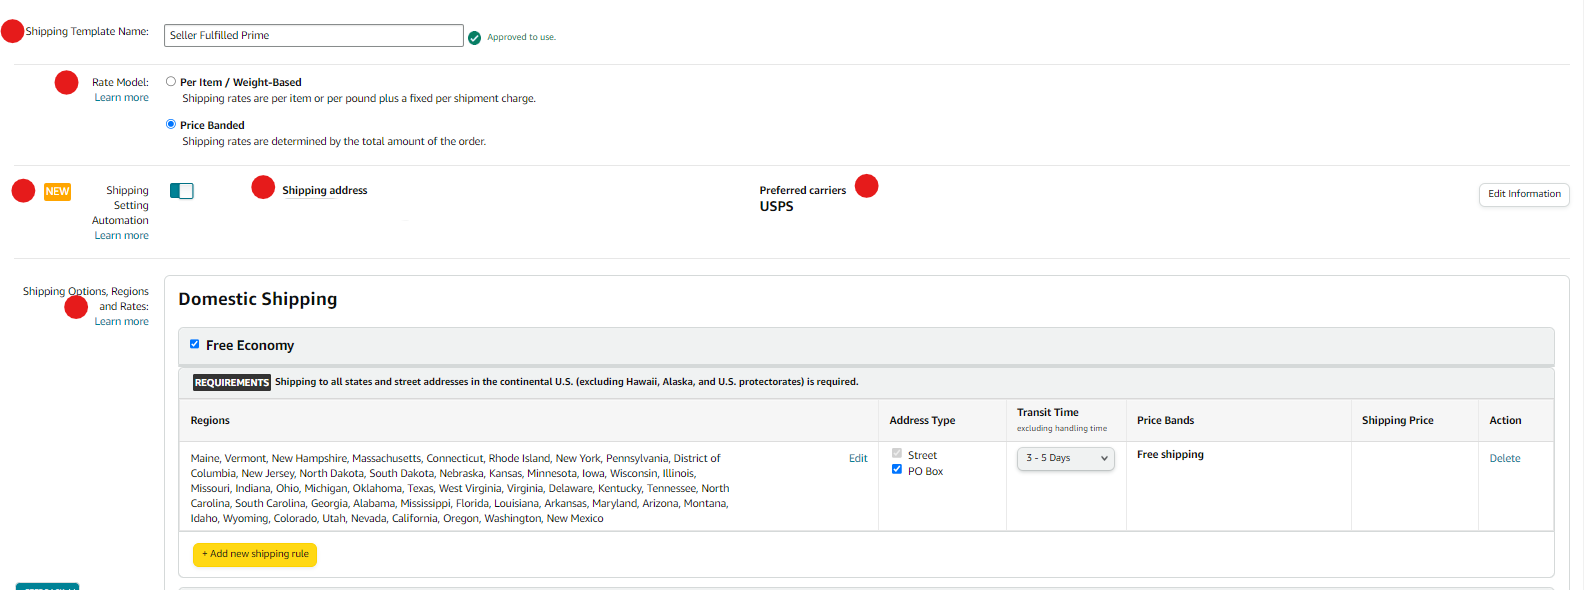
Click "Create New Shipping Template" or choose a template from the dropdown menu. If it's your first time creating a shipping template, select "Create a New Shipping Template" and click "Ok".
Note: If your Merchant Fulfilled SKU weighs less than 16oz, select Template A. If it weighs more than 16oz, select Template B. Keep in mind that the templates were designed for packages that are no more than 12 inches in any direction and weigh less than 70 lbs.
Enter the relevant information for each section, including the Shipping Template Name (we recommend "Prime" or "Seller Fulfilled Prime"), Rate Model, Shipping Region Automation, Prime Settings, and Shipping Options, Regions, and Rates.
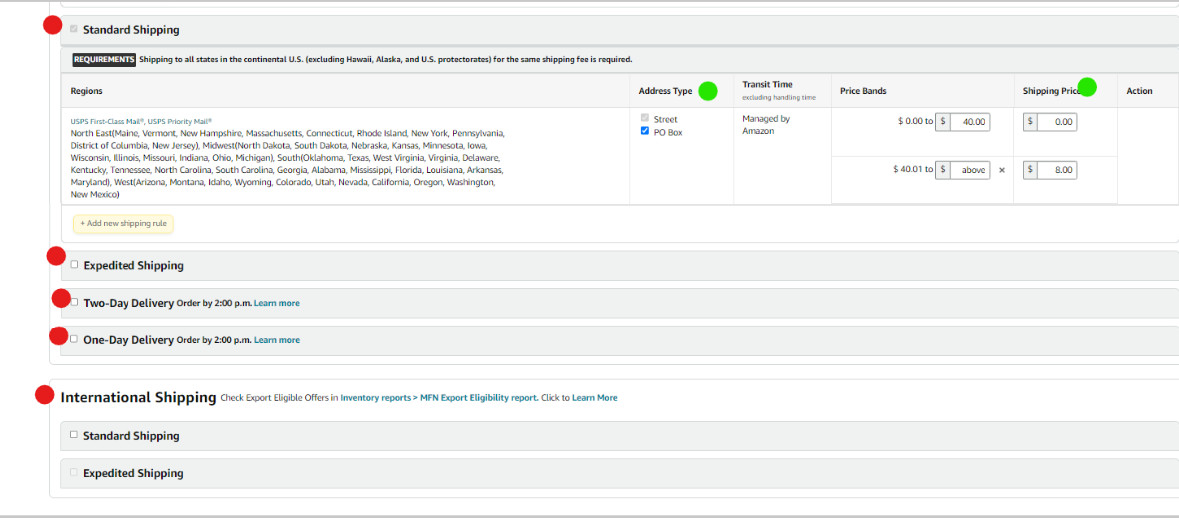
Customize your shipping rates, transit times, and address types for Standard Shipping, Expedited Shipping, Two-Day Delivery, and One-Day Shipping, and add regions or states to the rule if needed. You can also set International Shipping Options.
Click the "Save" button at the bottom of the page to create and save your new shipping template.


