- Backup file.
- Download a Category Listings Report (CLR).
- Save it both in the Asana task and the client's folder.
- Download a category-specific template.
- Identify the SKUs that you want to add to the parentage (both FBA and MFN)
We need to identify the SKUs that we will be adding to the parentage. We need to ensure that both the FBA and MFN SKUs are added to the template upload file to make the catalog more organized.
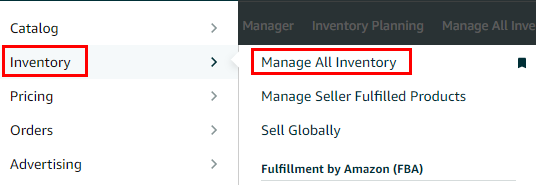
- When you have your list of ASINs that need to be parented, go to Inventory > Manage All Inventory

- Search for each one in the catalog and grab the SKU of each item under that ASIN (make sure that the “Status” and “Fulfilled by” are set to “All”).
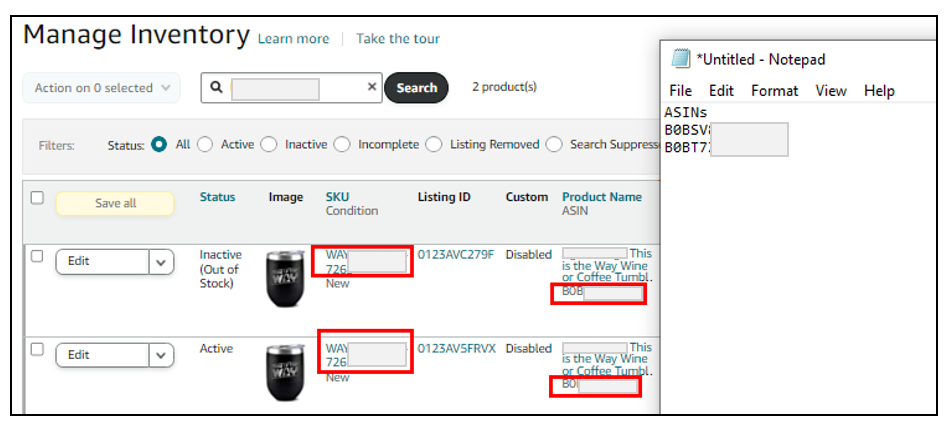

- Identify the variation name to be used for the parentage based on the variation theme that will be used. (SKUs with the same ASIN will have the same variation name).
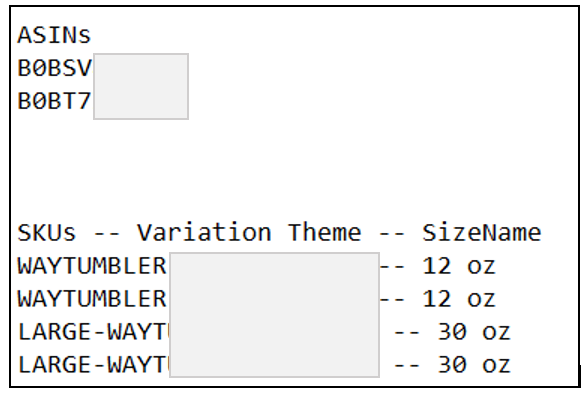

- Once we have that list, we open the template we downloaded and fill out the necessary information.
4. Fill out the flat file
I. Child SKUs

II. Variation Data
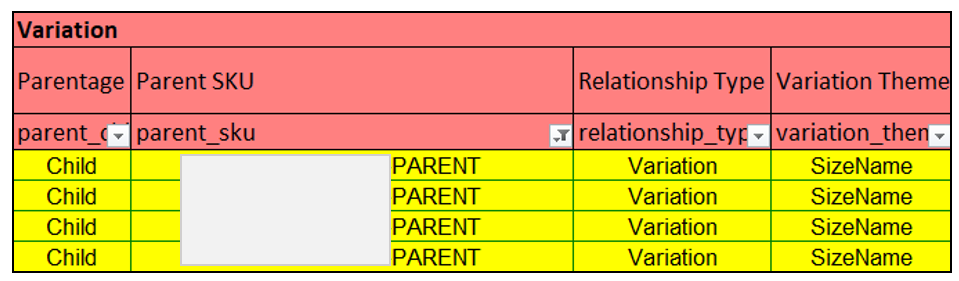
- Parentage: Child
- Parent SKU: WAYTUMBLER-PARENT (this is the existing parent SKU)
- Relationship Type: Variation
- Variation Theme: Size (variation theme of the existing parentage)

III. Variation Theme Name attribute
You will need to find the attribute column that corresponds with the variation name. In this example, we are using a size parentage so we need to find the SizeName attribute on the template.
Press CTRL + F to bring up the Find tool and enter “size” or your variation "theme” to find the size attribute.
IV. Update_Delete
PartialUpdate
This column should be filed with PartialUpdate. If you use “Update” instead of “PartialUpdate”, Amazon will erase the data for any cell that does not have data input in the template you create. In this case, all data would be erased except for the parentage data we are adding.
V. Fulfillment Center ID
Under the Fulfillment Center ID, use AMAZON_NA (NA for North America, CA for Canada, MX for Mexico, etc) if it’s Fulfilled by Amazon and DEFAULT if it’s Fulfilled by Merchant. 
REMINDER:
When you submit inventory feeds to update inventory levels for items that you sell on Amazon's website, never leave the fulfillment-center-id null. For a self-fulfilled inventory, enter DEFAULT in this column. For Fulfillment by Amazon inventory, enter either AMAZON_NA, AMAZON_EU, AMAZON_JP, or AMAZON_IN depending on your marketplace. This helps ensure that each item is fulfilled as you expect it to be.
IMPORTANT NOTE:
- If it’s FBA, you have to fill out the following columns:
- “batteries_required”
- “supplier_declared_dg_hz_regulation1” under the Compliance section.
- Pesticide Marking
- EPA Registration Number
- Pesticide Registration Status
- This product is not a pesticide or pesticide device, as defined under the U.S. Federal Insecticide, Fungicide, and Rodenticide Act.
Once you have filled out all the required information for adding SKUs to a parentage, this preview serves as an example of what the flat file will look like.
5. Save the flat file and upload it on Seller Central. Go to Inventory > Add Products via Upload > Upload your Inventory File. Refresh the page first before attaching the file and make sure you’re on the right Amazon store. Then click Upload file.

Once the file has been uploaded and processed, let it sit for 15 minutes. It can take a little time for the file to finish being processed.
Important Note:
- Monitor the Upload Status. If it says “Complete Drafts”, download the Processing Report to see what caused the error and fix it accordingly.
6. Verify if the SKUs are added to existing Parentage
Once you receive the update from Amazon about the successful processing of your upload file, find the parent in the catalog and check that the child SKUs are attached.
You can verify the parentage from these options:
A. Manage All Inventory
- Go to Seller Central > Inventory > Manage All Inventory and search for the parent SKU.
- Make sure that the Status and Fulfilled by are set to “ALL”.
- Click the dropdown next to the Parent SKU and verify that all of the child SKUs are present.
B. Variation Wizard
To access the Variation Wizard, follow the steps below:
- On the Inventory link in your Seller Central account, select Add a Product.
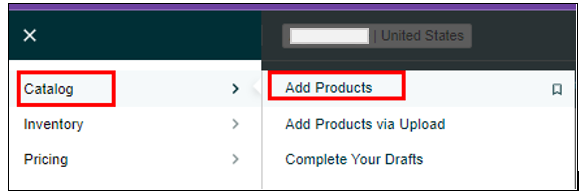

- In the Add Products page, click on create variations using Variation Wizard

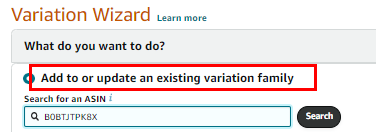
- Click the option “Add to or update an existing variation family” to search the ASIN.
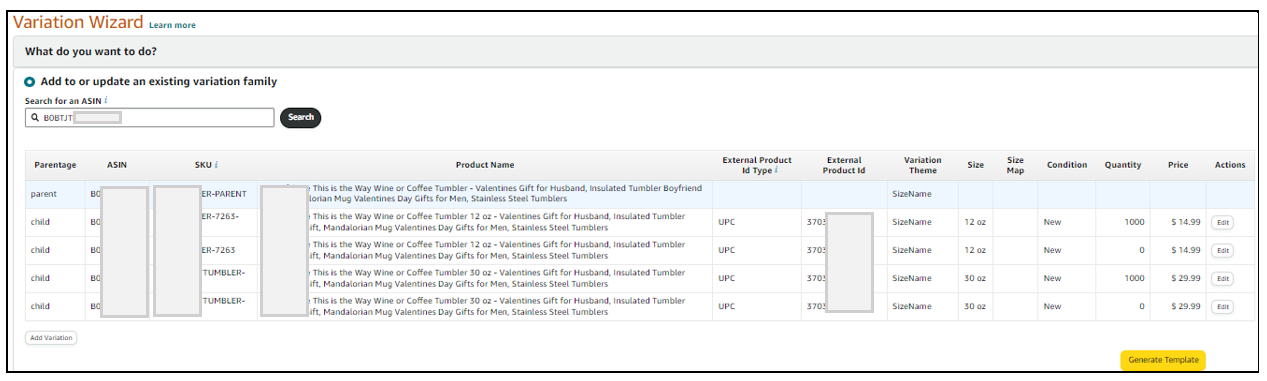
-

- This is how a parentage setup looks like in ‘Variation Wizard.’

C. Amazon Detail Page
To confirm that you have successfully added the listing to your existing parentage, navigate back to the inventory page and click on the title of the child SKU. This will display the parentage of the product detail page (PDP). If the SKU you added is present within the group, it means that the addition was successful.
