Before editing prices, it is important to communicate, and get client’s approval first. Include the approval proof (screenshot or fireflies call link) as Task Details or as a Comment.
To edit pricing on Seller Central for your product listings, there are several ways available:
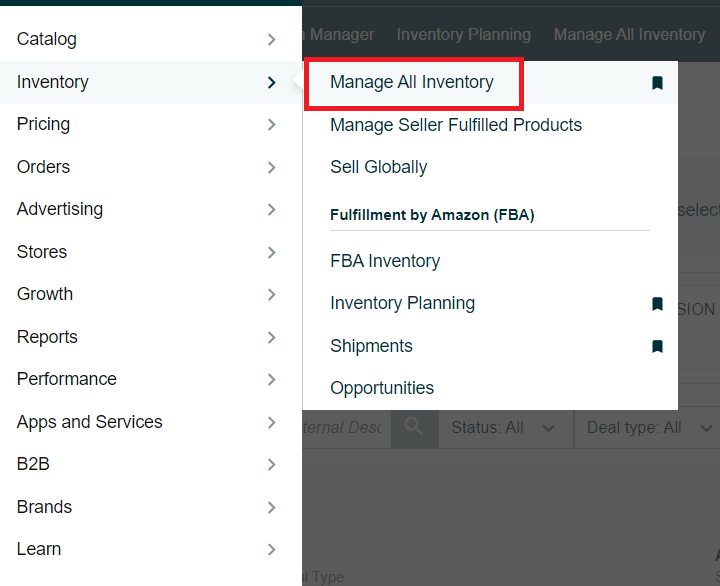
One way is to select “Manage Inventory” from the Drop Down Menu of the “Inventory” tab on the top menu of Seller Central.

2. You can also manually edit the pricing of each listing in the “Price + Shipping” or “Business Price + Shipping” columns.

3. Make sure to click the “Save All” button at the top left side of the table to save any changes made.

4. Another option is to click the “Manage Pricing” link at the top of the page and make pricing adjustments there.

5. The third alternative is to use the pricing update template by searching "price and quantity template". A pop-up window will appear where you can download the “Price and Quantity File Template”.


6. While completing the Template, make sure to refer to the “Data Definitions” Worksheet.
7. Enter your SKU and the relevant pricing as described in the “Data Definitions” Worksheet.

8. After completing all the pricing updates, save your file and upload it to Seller Central by going to the “Add Products via Upload” option from the Drop Down Menu of the “Category” tab on the top menu of Seller Central.

9. Under the Upload your spreadsheet tab, choose your file by clicking on the “Browse files” button. You can also enter an email address to be notified once your file is uploaded.

10. Finally, click the “Upload” button, and your changes will be uploaded to your catalog.

